WARNING
This page is machine-translated by Gemini.
Tutorial (Hands-on Guide)
macOS Users
For Mac users, please replace Ctrl with Cmd (⌘) and Alt with Option (⌥) throughout this guide.
This tutorial walks you through experiencing SheepWeave's core CAT capabilities using a sample project.
1. Creating a Project Folder
Create an empty folder on your PC (e.g., SheepWeave_Tutorial in your Documents directory).

2. Placing Sample Files
Download sample files from here. Extract the ZIP archive and move the JSON file into your project folder.

3. Opening in VS Code
- Launch VS Code.
- Select
File > Open Folder...and open your project folder. - Click the SheepWeave icon in the bottom status bar to open the side panel.
4. Starting Translation
Step 1: Extracting Project Assets
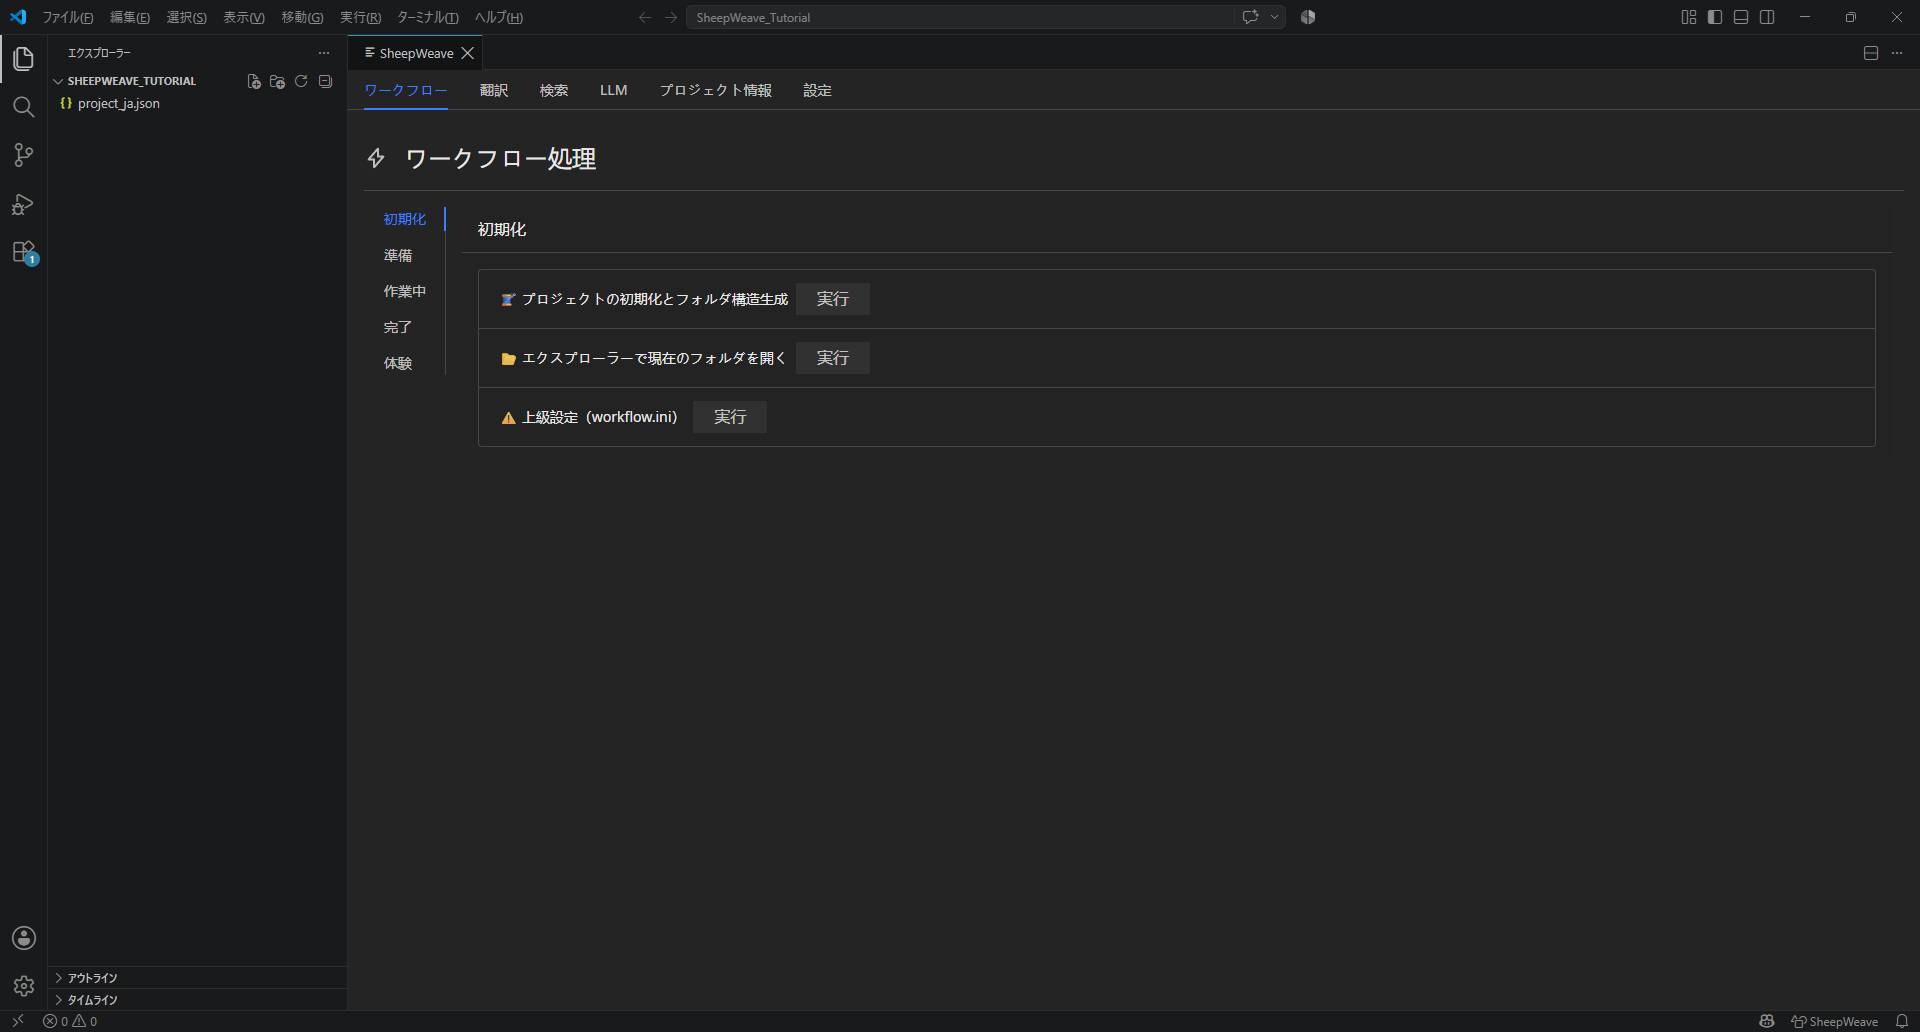
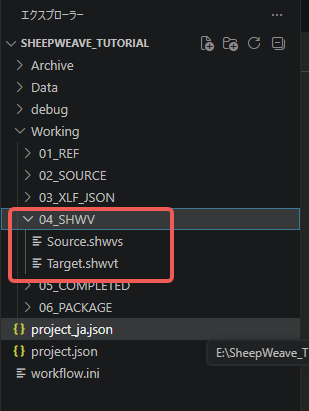
Open the Workflow (Flow) tab on the panel, choose Experience on the left menu, and click Execute. This unpacks the project and generates folders including 04_SHWV containing Source.shwvs (source text) and Target.shwvt (working translation file).
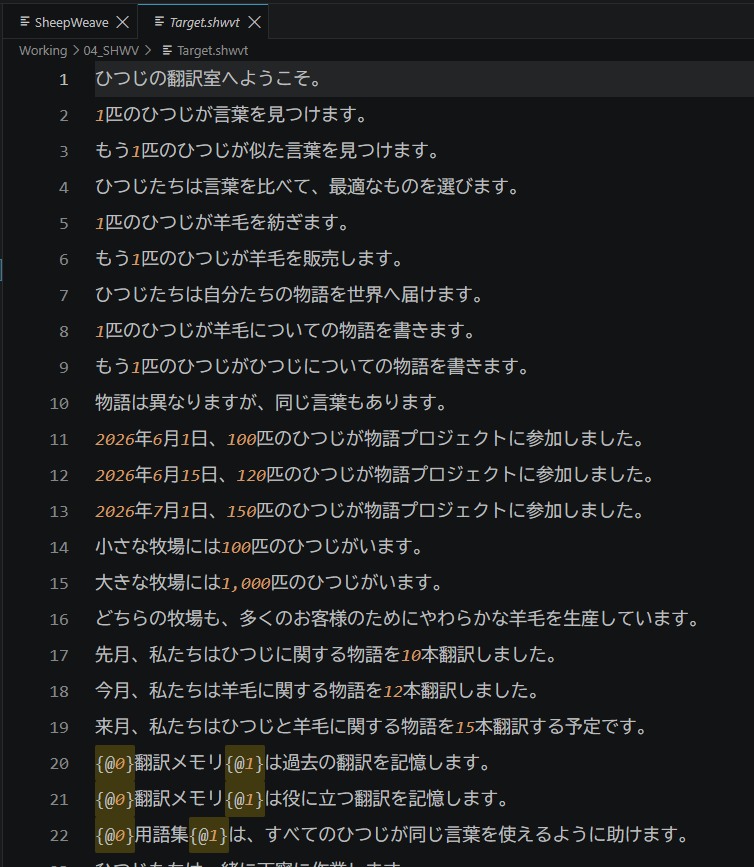
Double-click Target.shwvt to open it.
Recommended Layout
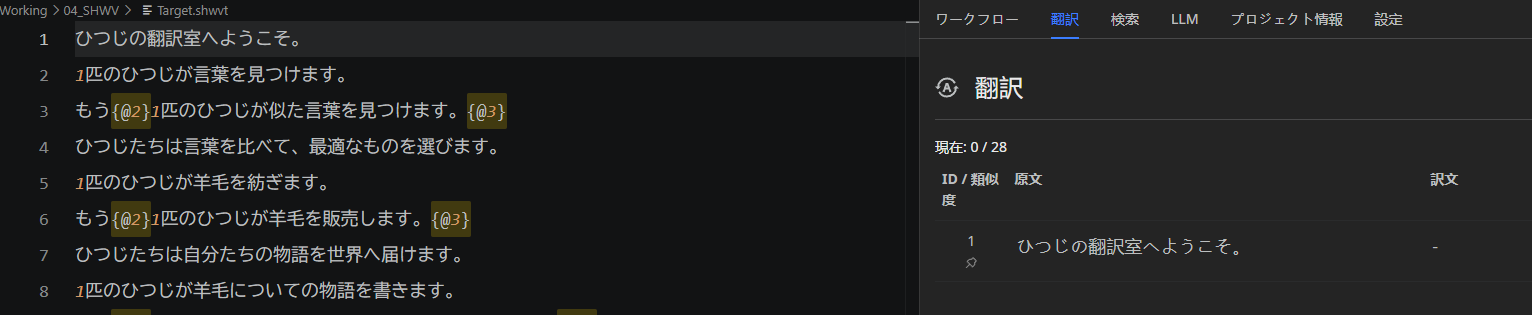
Split the editor into two columns (Ctrl + 2) so you can view Target.shwvt and the SheepWeave panel side by side. Toggle the file explorer with Ctrl + B for maximum screen space.
Step 2: Translating Segments
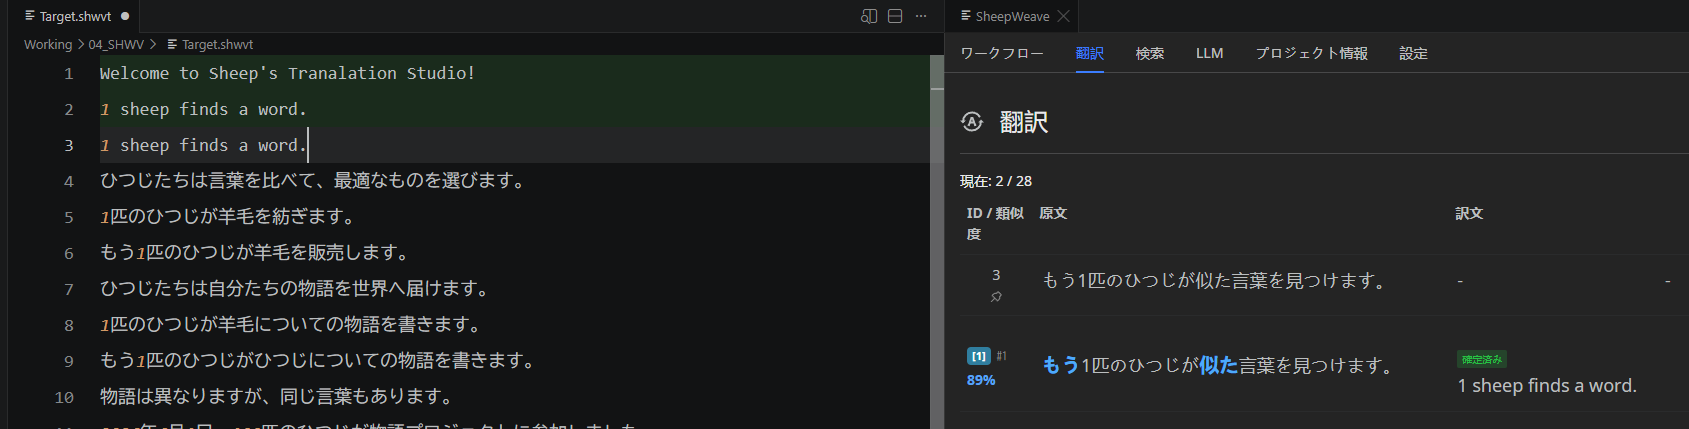
Switch the panel to the Translate tab (Alt + 2). Place your cursor on line 1 of Target.shwvt. The source sentence will appear in the Translate panel.
Translate line 1 directly in the editor.
Fixed Line Count Rule
To preserve 1:1 segment correspondence, adding or deleting line breaks is forbidden. If you attempt to add or remove a line break, the editor automatically undoes it.
Press Ctrl + Enter to Confirm the segment. Line 1 turns green, recording the segment pair and advancing your cursor to line 2.

Step 3: Leveraging TM and Auto-Propagation
On line 2, observe the TM match area below the source display. It shows the translation from line 1 with diff highlights. Press Ctrl + Shift + 1 to apply the first TM suggestion directly into line 2! Adjust the diffs and confirm (Ctrl + Enter).
Step 4: Handling Tags
When encountering inline tags like {@0}...{@1}, these represent formatting (bold, links, etc.). Preserve these tags around the corresponding target words so formatting is retained in the exported file.

Complete translating all lines and press Ctrl + S to save. Your translations are now reflected in project.json!